It can be very frustrating when your Windows 11 mic is not working. You need it for work or something personal, but your computer is not hearing you. The following tips will help you troubleshoot what is causing your mic not to work. Since the cause of the issue is not the same for all, keep reading to see which of the various listed tips will get your mic working again. It could be as easy as unmuting your mic, or it might be possible you’ll need to use the built-in troubleshooter Windows 11 has.
How to Fix Windows 11 Computer Mic Not Working
There are easy tips you can start with to get the mic working again. Have you tried connecting the mic to another jack? Maybe the one you’re using has issues, and that’s why it’s not detecting anything. You can also try connecting something else to that jack to see if it’s the jack or the mic’s cable. Also, don’t sit too far away from the mic. Every mic is different and requires a different distance. Try sitting close and working your way from there. If your mic has a mute button, ensure it’s not on.
Does the App Have Permission to Access Your Mic?
If the app doesn’t have permission to access your computer’s mic, that explains the issue. To check if the app has permission go to:
- Settings (Windows + I)
- Privacy and Security
- Microphone
Ensure the Microphone access and Let apps access your microphone are toggled on.
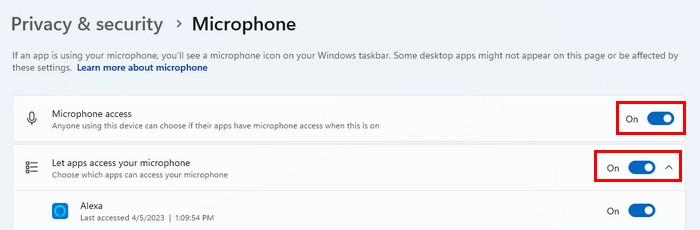
If you haven’t expanded the Let app access your microphone, you’ll see a list of all the apps that need access to your mic by clicking on it. Look for the app you’re using and toggle it on if it’s turned off.
You can also go to the mic’s properties by pressing the Windows + R keys and typing mmsys.cpl, press enter. When the Sound window opens, click the Recording tab, right-click on the mic, and go to properties. Once in Mic properties, click on the Advanced tab, and in the Exclusive Mode section, uncheck the box for the Allow applications to take exclusive control of this device.
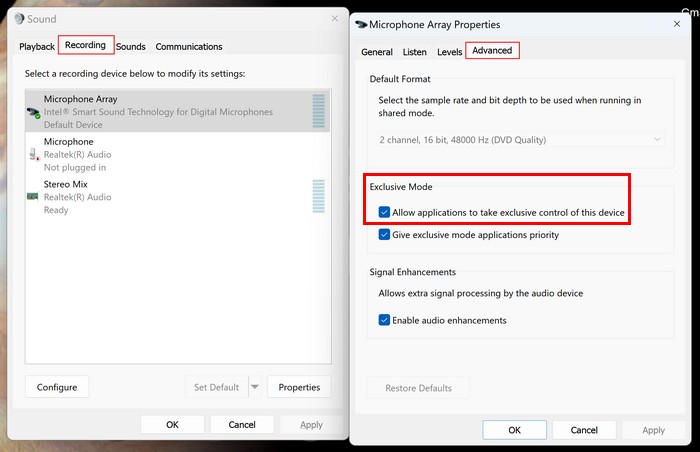
Click Apply and OK to save your changes.
How to Set the Correct Input Device
Another reason your mic is not working is that the wrong input device is selected in settings. To check the selected device, press the Windows + I keys to go to Settings. Once in settings, click on System > Sound > Input.
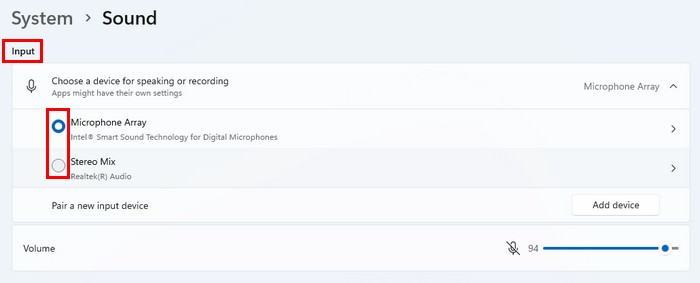
If it’s still not working, click on the input device to open more options. Under General, you will only see one option (Audio). If the button to the side says Don’t allow that means that it’s working.
How to Use the Audio Troubleshooter to Fix Mis Issues on Windows 11
Windows 11 has various troubleshooters you can use, and the Audio troubleshooter is one of them. You can access this troubleshooter by going to:
- Settings (Windows + I)
- Troubleshoot
- Other troubleshooters
- Audio
Click on the Run button to see if Windows detects any issues—Apply any fixes that Windows suggests and restart your computer.
Fix Mic Issues Restarting Windows Audio Service on Windows 11
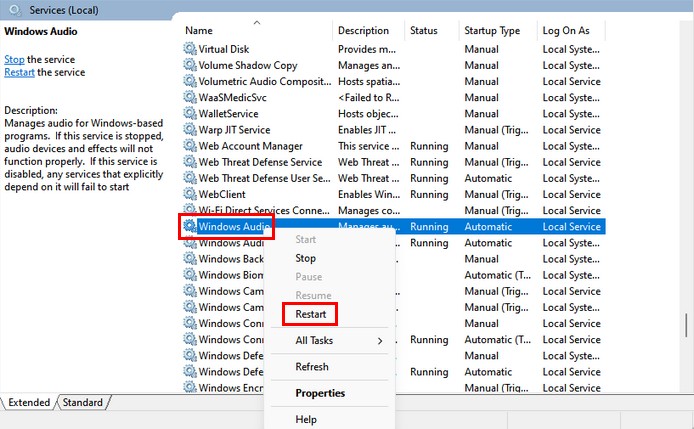
If Windows Audio Service stops working in the background, that could explain your issue. To restart it, press the Windows + R keys, enter services.msc, and enter. Use the sidebar to go to Windows Audio and right-click on the option. Choose restart.
Fix Mic Not Working on Windows 11 by Updating or Uninstalling Drivers
Outdated Drivers can cause all sorts of issues and could also explain why you’re having problems with your mic. Let’s try updating them, and when you restart your computer, see if the issue is gone. If that doesn’t help, then you can try installing them. Open the Device Manager by right-clicking on the Windows Start Menu and clicking on Device Manager. Expand the Audio inputs and outputs and right-click on your mic. Choose Update Driver > Search automatically for drivers. Install any updates.
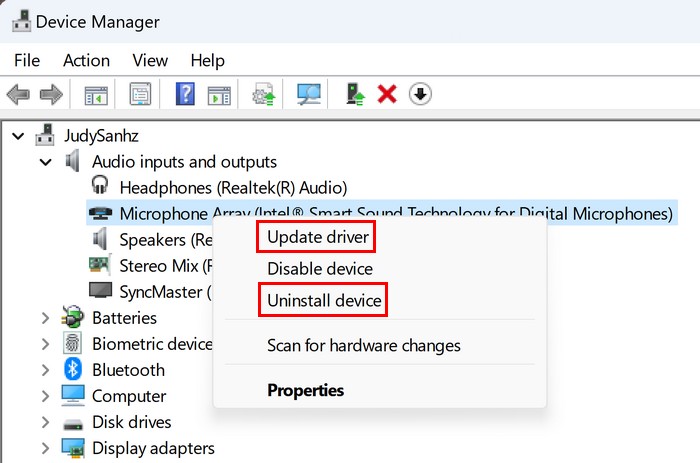
If updating didn’t work, you can repeat the process but choose the uninstall option this time. When uninstalled, select the Scan hardware changes option, and your Windows computer will re-install it.
Fix Mic Not Working on Windows 11 By Enabling Mic on Keyboard
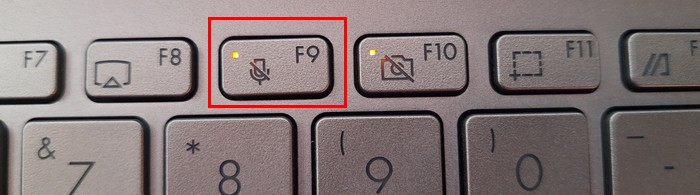
Some laptops have a dedicated mic button on the keyboard to turn off the mic automatically. It will be at the top of your keyboard. The exact position may vary depending on your computer, but it should be there. If you see the light on the mic button, it’s off, and that’s why you haven’t been able to use your keyboard. Ensure the light is off, and you should see a message on your screen letting you know the mic is enabled.
Fix Mic Not Working on Windows 11 by Running an SFC and DISM Scan
To run an SFC and a DISM scan, you must run the Command Prompt as an administrator. Start typing Command Prompt in the search field and choose the option to open it as an administrator. Once it’s open, type sfc /scannnow and press enter. The process will take a few minutes, and when it’s done, it’s time to run this other command; DISM.exe /Online /Cleanup-image /Restorehealth. When the process is done, you’ll see a message letting you know the command was done successfully.
Further Reading
The mic could also not work on other devices. If it happens to you, here is how you can fix the mic not working on Android.
Conclusion
There are various reasons why the mic on your Windows 11 computer won’t work. The good news is that you can also try multiple methods to fix the issue. You can use the built-in audio troubleshooter in Windows 11 or the Command Prompt to fix any corrupted files. It’s always best to start with the basic fixes since sometimes the fix is as simple as unmuting your mic. How long have you been experiencing this issue? Let me know in the comments below, and don’t forget to share the article with others on social media.


Did this help? Let us know!